How to Remove Sunburn and Redness from Photos with Objectremover
Have you ever taken the perfect vacation selfie, only to realize your skin looks red and sunburned? It's frustrating. Do you have such photos? What ways can you think of to eliminate those sunburns and red spots?
Whether it's a sunburned face or a portrait with uneven skin tone, the good news is that there are effective ways to restore your photos to their original beauty. It can be done in a few easy clicks using AI tools. Let's find out together.

What Causes Redness to Appear So Vibrant in Photos?
Sunburn appears more intense in photos due to how light interacts with your skin. Cameras amplify warm tones, making redness stand out. Additionally, auto-exposure settings often highlight contrasts between red patches and natural skin.
Cameras exaggerate shadows and highlights. This contrast makes redness more pronounced, drawing attention to uneven skin tones.

Why Fix Sunburn in Photos?
Have you ever felt that sting of regret when you see your sunburn in a cherished photo? Photos are more than just pixels; they're memories. Redness and uneven skin tones can distract you from the moment's beauty. The science of skin redness in photos.
Did you know that camera sensors exaggerate redness? Due to lighting and contrast, sunburns appear more visible in photos. objectRemover eliminates this effect effortlessly. Fixing these issues isn't about vanity—it's about preserving the memory just as you want to remember it.

What is ObjectRemover?
ObjectRemover is a cutting-edge AI photo editing tool designed to help you erase unwanted objects from your pictures. While it's fantastic for removing objects, it also excels at correcting skin imperfections like sunburn and redness. Think of it as a magic wand for your photos—one click and the flaws are gone!
Why Choose ObjectRemover for Removing Sunburns?
- User-Friendly: The intuitive interface makes it easy even if you need to be tech-savvy.
- Precision Tools: Achieve seamless edits without compromising quality.
- Fast Results: Save time while achieving professional-level outcomes.
Step-by-Step Guide to Removing Sunburn
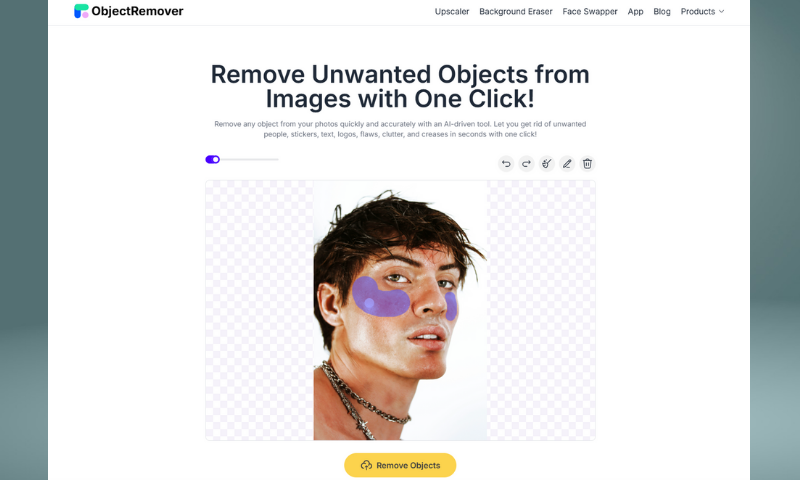
- Step 1: Upload your photo to ObjectRemover. Objectremover's homepage has a box in the middle of the page. You can click on the box or drag and drop the image.
- Step 2: Use the object eraser tool. After uploading the image, you can adjust the brush size by dragging the slider in the upper left corner. Sliding to the left makes it smaller, and sliding to the right makes it bigger.
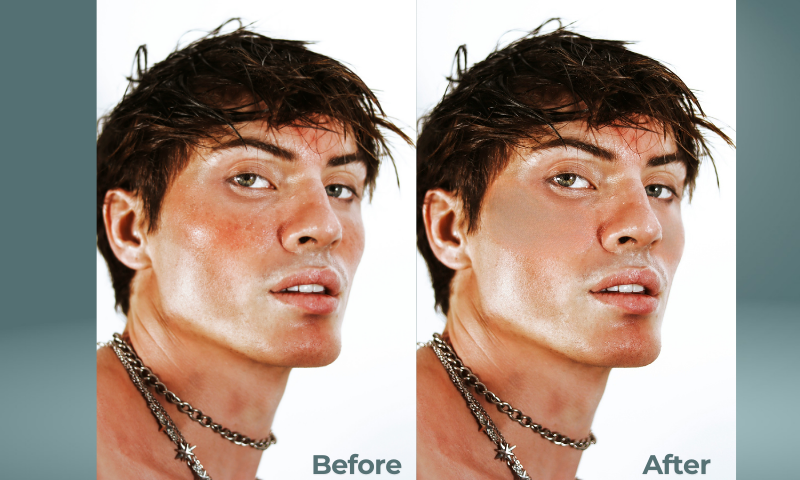
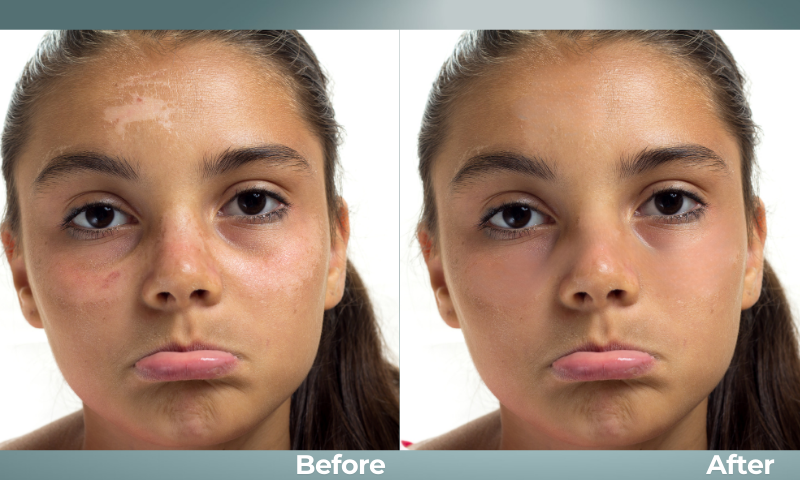
- Step 3: Adjust the intensity. Next, let's use the brush to cover the areas of the character that have sunburns on them. Once the covering is complete, click the yellow button at the bottom of the image. "Remove Objects" and wait for the process to complete. For the edges to be erased, you can turn the brush down to achieve a more accurate coverage.
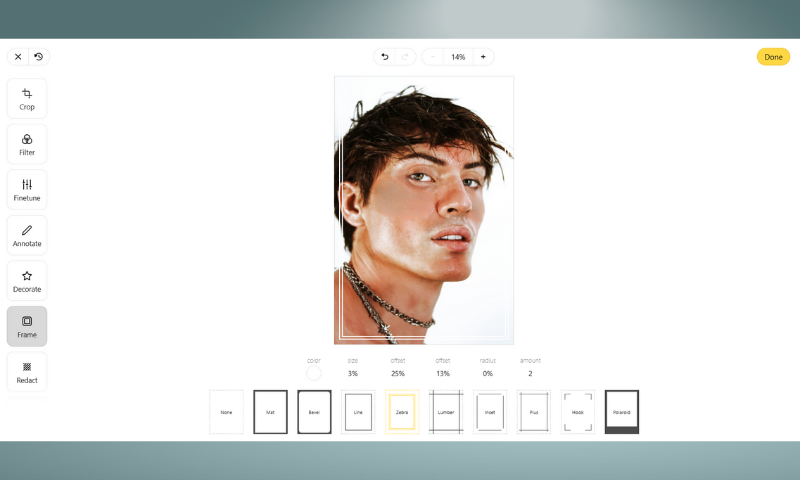
- Step 4: Save and download. After complete processing and you are satisfied with the removed sunburn result, click the download icon in the upper right corner to save locally. If you need to edit, click the pencil icon in the upper right corner, you can add a border to rotate and crop the image!
Tips for Natural-Looking Edits
- Don't Overdo It: Subtle changes are vital to keeping the photo realistic.
- Match Skin Tones: Use the blending feature to ensure uniformity.
- Focus on Details: Pay attention to areas like the nose and cheeks, where redness is most prominent.
Enhancing Skin Appearance After Redness Removal
Add Subtle Glow and Warmth to the Skin. Add a gentle glow using soft filters. This brings vitality back to your edits without overdoing it.
Sharpen Details Without Overdoing It. Subtle sharpening enhances the overall image. Avoid making skin textures look artificial by using moderation.
Preventing Sunburn in Future Photos
- Use Sunscreen: Protect your skin before outdoor shoots.
- Diffused Lighting: Position subjects under shade or use reflectors for balanced lighting.
- Proper Camera Settings: Adjust white balance and exposure to minimize harsh redness in the first place.
- Photography Hacks to Minimize Redness: Use polarizing filters and avoid shooting in direct sunlight. Optimal lighting minimizes redness during the photo-taking process.
Wrapping up
Removing redness from photos is more than a technical skill—it's a way to breathe new life into your memories. You can confidently turn flawed pictures into beautiful keepsakes by mastering these techniques.
Whether you're a casual photographer or a professional editor, these strategies will help you restore natural beauty to every shot. Now, let's get out our sunburn pictures to fix it and witness the magic of Objectremover together!
